When you want to write code on your computer, you usually need to install a lot of development tools and additional software. If you are familiar with Linux, you may have used a package manager to install additional software packages on your system. On a Mac Homebrew is what you are looking for. Homebrew is the missing package manager for MacOS but unfortunately, it does not come bundled with the operation system like package managers for Linux. But hey, you are lucky! Installing Homebrew ist quite easy.
What does Homebrew do?
Homebrew simplifies installing command line tools and software like Git, Ruby, Node, OpenCV or pyenv. Generally speaking, Homebrew is good for adding software and tools to your computer. With just one simple command, Homebrew handles downloading building and installing the packages for you. This helps you to avoid the pitfall of creating possible security issues that may come with using the sudo command to install software.
What do you need for Homebrew?
There are not many prerequisites. You should be somewhat familiar with the Mac Terminal application of iTerm. If you are looking for the Terminal app on MacOS, just hit “command + space” and type Terminal or go to the Utilities folder inside the Applications folder.
As prerequisites on the macOS side, the Homebrew team lists the following:
- A 64-bit Intel CPU
- macOS Mojave (10.14) (or higher)
- Command Line Tools (CLT) for Xcode: You can install them with the command “
xcode-select --install” in the Terminal or by installing Xcode - A Bourne-compatible shell for installation (e.g.
bashorzsh)
If you meet those requirements and you are interested in installing Homebrew, we can get you through this. It’s straight forward. The Homebrew installation script tells you everything it does before it does it and it does all the work for you.
Installing Homebrew
To install Homebrew just switch to your terminal and enter the following command:
/bin/bash -c "$(curl -fsSL https://raw.githubusercontent.com/Homebrew/install/HEAD/install.sh)"
After you hit return you should see something like this:
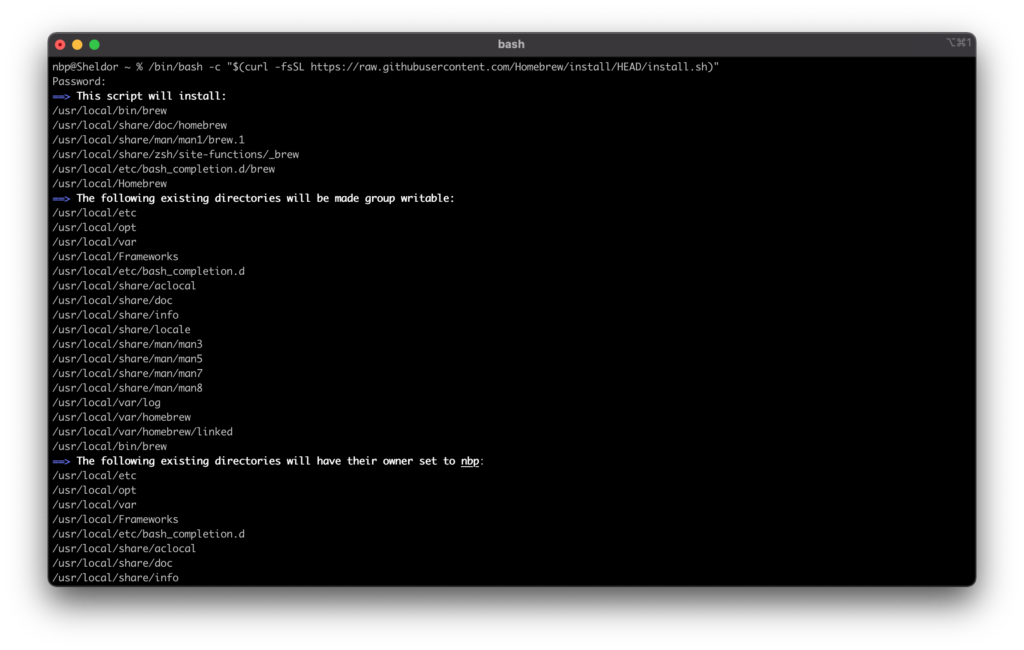
The script asks you for your consent do the listest steps. After you hit return again, everything runs on auto pilot. After a couple of seconds, the installation is completed and you see something like this:
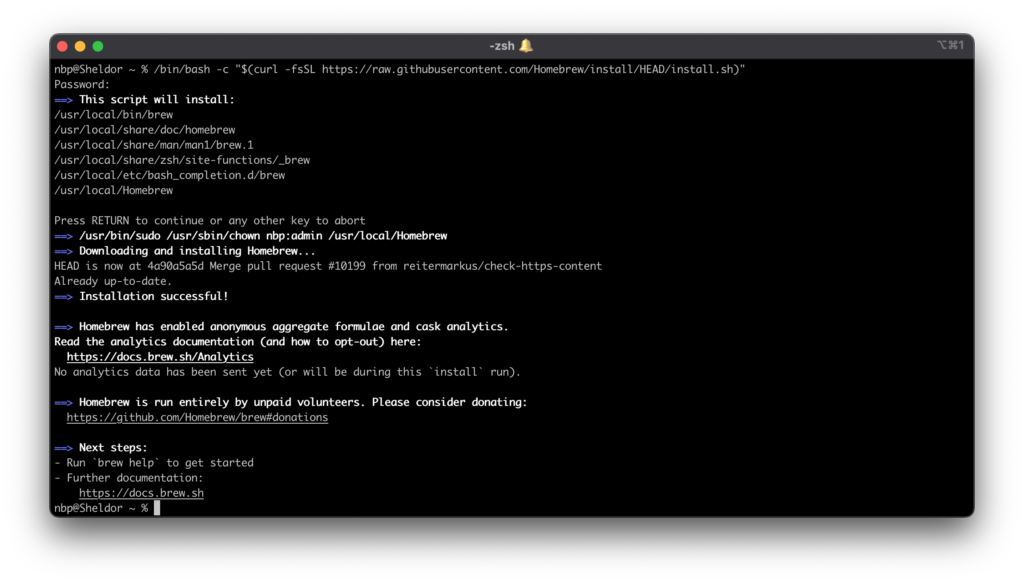
Good job! Now you can use Homebrew. To get you started, here are some useful commands:
brew helpshows some example usages and commandsbrew doctorchecks for issues with your Homebrew installations or your installed formulasbrew install <name>installs the formula (that’s how the packages are called) with the given namebrew uninstall <name>uninstalls the formulabrew updateupdates Homebrewbrew outdatedlists all outdated packages that need an updatebrew upgradeupdates all outdated packagesbrew pin <name>pins a formula to the current version. That means it will not be upgraded bybrew upgradeeven when a newer version is available.brew unpin <name>unpins the formula, so it will be updated again.
Uninstalling Homebrew
If you really want to uninstall Homebrew, don’t worry. It’s as easy as installing it. Just execute the following command in your terminal:
/bin/bash -c "$(curl -fsSL https://raw.githubusercontent.com/Homebrew/install/master/uninstall.sh)"The script warns you about what will be removed. If you accept it, the rest will be done automatically and you will get a confirmation message in the end.
That’s it. If you had any problems with the installation, just let me know. If you want to get updates on new posts and tutorials, just sign up for the newsletter we send out from time to time.

